Migrate Connection Objects
This Quick Start Guide gives you the basic steps you need to know to begin migrating objects between connections. Migrations provide the following benefits:
❑Synchronize changes between environments by copying, replacing, merging, or deleting objects.
❑Migrate multiple objects at one time, or individually.
❑Migrate from a TM1 server connection or from a Snapshot.
❑Build migration packages for deployments or disconnected environments.
❑Preview migrations before processing and save results as an HTML report.
|
Migrations can currently only be used for making structural changes on a server. Be aware that structural changes such as deletions and replacements can cause data loss. For example, replacing a cube will cause any data values in that cube to be cleared. |
|
Prior to performing migrations, ensure that your TM1 servers have been backed up. Changes to TM1 cannot be reversed through TM1Compare. |
Basic Migration Steps
Standard migrations are performed through multiple steps:
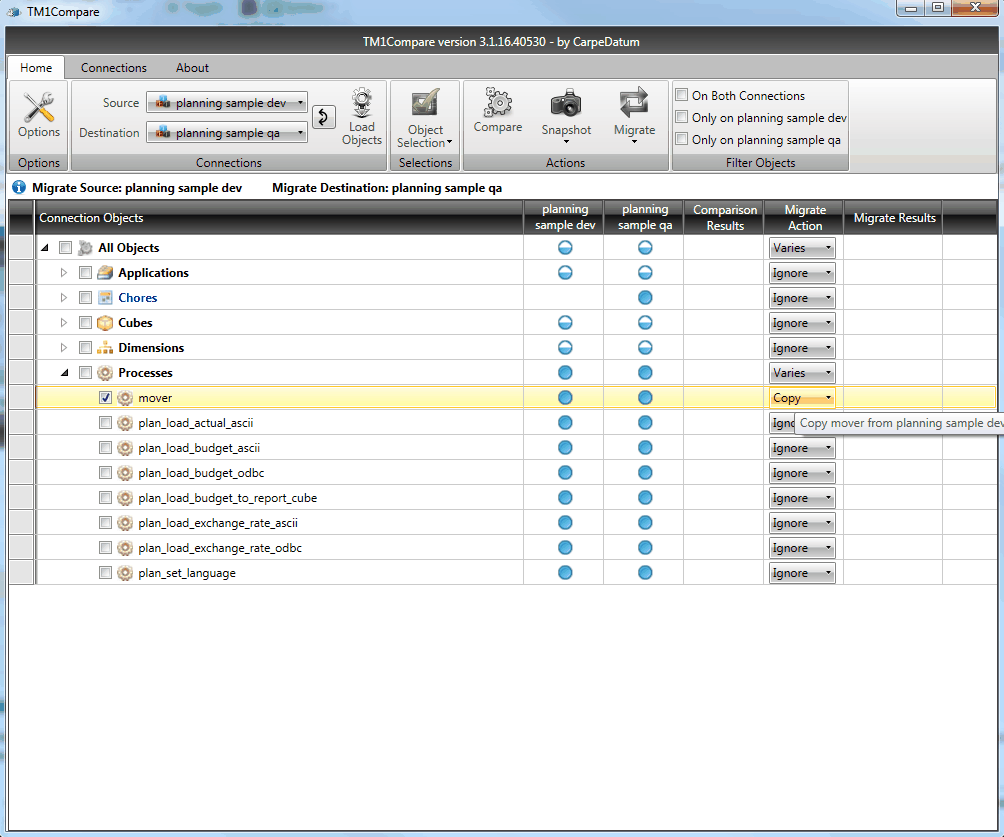
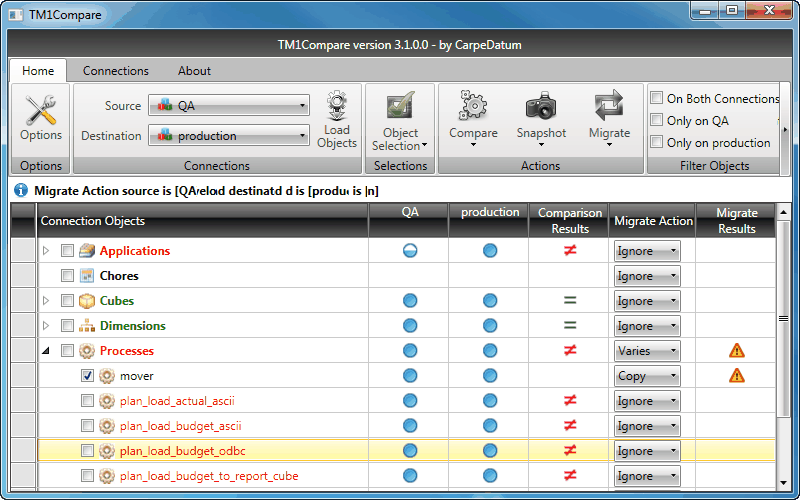
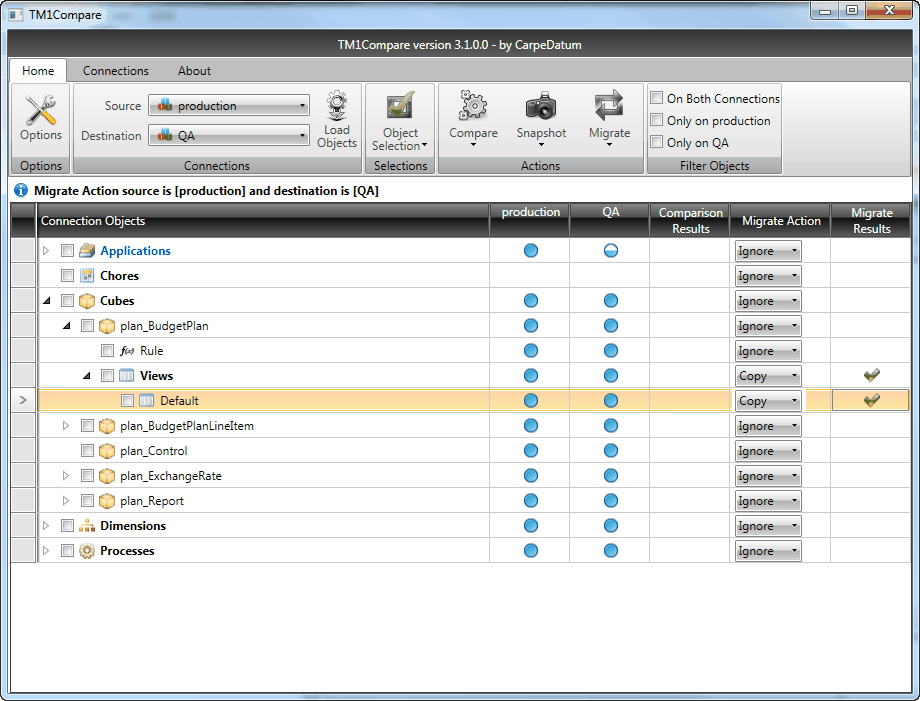
The first step in performing a standard migration is deciding which objects to migrate. Similar to comparing connection objects or creating snapshots, migrations can be performed on "All" objects, "Checked" or "Highlighted" objects, or "By Object Type". To perform "Checked" or "Highlighted" object migrations, ensure that the object is checked or highlighted in the main window. The screen-shot below displays the "mover" process is checked and highlighted, allowing either option.
The next step in a standard migration is to set the Migrate Action. In the "Migrate Action" column displayed in the screen-shot above, the "Copy" action has been selected, and a descriptive tool-tip displays when hovering the mouse pointer over the selection. In this example, a "QA" server connection has been selected as the Source, and a "production" server has been selected as the Destination.
The types of migrate actions that can be performed are as follows: ❑Copy: ▪Similar to a file-copy in Windows, if the object already exists in the destination, objects that already exist on the destination will be replaced with the source object, while objects that don't exist on the destination are created new as copies of the source object. ▪To prevent data loss, care should be taken when replacing existing objects. Copying cubes and dimension members can result in data loss on the destination connection. Cubes with different dimensionality will clear their data when copied. Using "Copy" instead of "Merge" for dimension members will rebuild dimensions ignoring any members not existing on the Source. To copy over only new members to a dimension, use the "Merge" action. ▪This action is available for all objects that exist on the Source connection.
❑Merge: ▪Brings over new members/attributes from Source without affecting existing members/attributes in Destination. ▪This action is only available for Dimensions, Dimension, Attributes and Members.
❑Delete: ▪Deletes an object from the Destination connection. ▪If TM1 prevents deletion of the object, an error message will return and be displayed by TM1Compare. ▪When deleting a top-level object such as a Cube, Dimension, or Application Folder, all child objects within are also deleted. ▪Dimension members cannot be deleted without deleting the entire dimension.
❑Sync: ▪This action is available only for group-level objects (i.e. Cubes, Cube, Dimensions, Dimension, Views, Subsets, Applications, Chores, and Processes). ▪This action will copy everything from Source to Destination and delete objects from the Destination connection that don't exist on the Source connection. ▪As with the "Copy" action, data loss can result when syncing cubes or dimension members.
❑Ignore: ▪This default action will ignore the object in migrations. ▪Actions performed on parent objects may have an affect on child objects, even if the "Ignore" action is chosen. For example, copying or deleting a dimension by design will result in changes to its members. Once the decision has been made which objects will be migrated and migrate actions have been selected, click the "Migrate" [
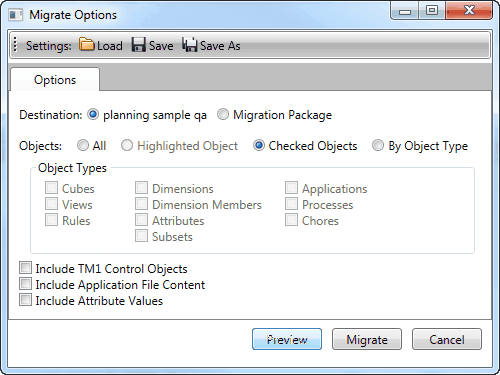
Similar to creating a snapshot, the Migrate Options dialog allows you to migrate "All", "Highlighted", "Checked" objects, or "By Object Type". It also gives you the options of including TM1 Control Objects, Application File Content, or Attribute Values. In contrast to creating a snapshot, however, the Destination Connection cannot be changed. This ensures that the Migrate Action selected in the main window will only be performed on the Destination Connection. At this point in the migration process, you may opt to save the output to a Migration Package instead of performing it directly to the Destination Connection. Migration Packages are described in detail later in this QuickStart. Prior to performing the migration, you may also choose to preview it. To proceed directly to the migration process instead, click the "Migrate" button. To cancel the migration process, click the "Cancel" button.
|
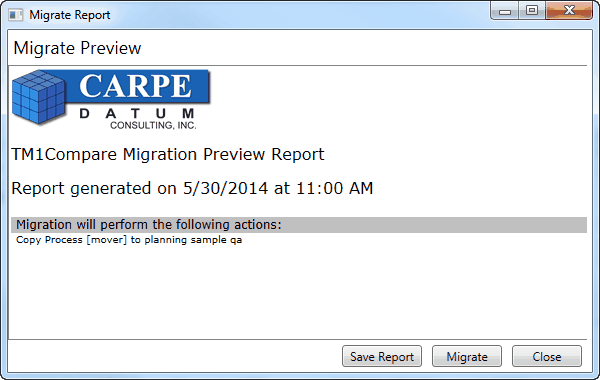
During a standard migration process, a preview report can be generated and saved. The screen-shot below displays a sample report for migrating a single process:
To save this report as an HTML file, click the "Save Report" button. To proceed with the migration as displayed in the preview report, click the "Migrate" button. To close the preview report and return to the "Migrate Options" dialog, click the "Close" button. |
Upon completion of a standard migration, either a success message or an error report will be displayed. Additionally, an icon will be displayed in the "Migrate Results" column of the main window.
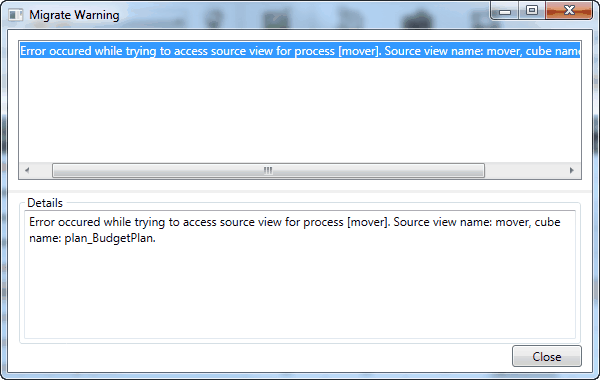
To review the details of the migration result, double-click the icon in the "Migrate Results" column. This will display a report window with detailed information. The screen-shot below shows the details for the "mover" process migration.
If a migration has been performed successfully, no error report will be displayed. Instead, the Migrate Result column will display a check-mark [
|
![]() Migrating from a Migration Package
Migrating from a Migration Package
New to this release of TM1Compare is the option of creating a Migration Package, which is a combination of a snapshot file and the selected migration actions. Migration Packages can be created and used as an alternative to performing a standard migration directly to the Destination Connection, and they can be especially useful in disconnected environments or for managing deployments. As with snapshots, when a Migration Package is initially created, it is automatically added to the available Source and Destination connections. To select a different Migration Package file, click the "Load Migration Package" option from the "Migrate" button's drop-down menu, and the Migration Package will be available as a Source or Destination connection. At this point, the rest of the migration process is identical to the above steps. |
In addition to "standard" migrations and Migration Packages, TM1Compare also gives you the ability to migrate through alternate options and shortcuts:
![]() Alternate Migration Options and Shortcuts
Alternate Migration Options and Shortcuts
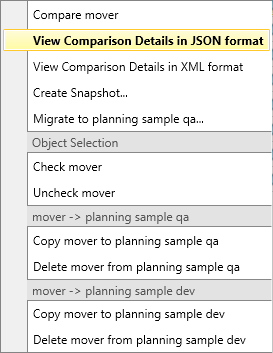
Alternate migration options and shortcuts can be accessed by right-clicking an object in the main window. The screen-shot below shows the results of right-clicking a "mover" process object.
Under the "Object Selection" header, shortcuts will be displayed depending on the object type. For single objects such as the "mover" process, only one option is loaded. The next section of the context menu gives shortcuts for migrating the "mover" process from the "development" connection to the "QA" connection. Below this section are shortcuts for migrating it the opposite direction.
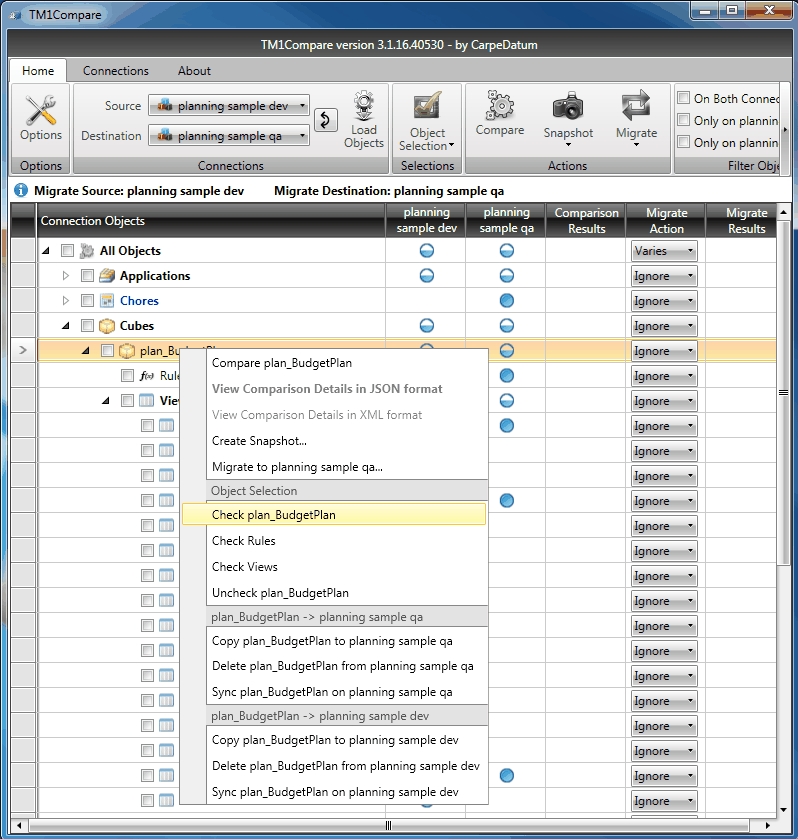
Other objects may display additional options depending on their type and status on each connection. For example the following screen-shot shows the options available for a cube with inconsistent statuses between connections:
|


